Okay so the pictures of the pillow I made are not the best but you get the idea. If you click on the images you can make it bigger and see the pillow a little better.


Supplies:
Pillow or Cotton stuffing
1 or 2 patterns of fabric measured to pillow size (should not need more than 1/2 a yard of each)
Scissors
Sewing needle and/or sewing machine
Thread in the color of fabric
TIME
Optional:
Optional:
Computer
Printer
Fabric printer paper
Instructions: This is a more time consuming project. Between work, visits home, and other obligations it took me close to a month to finish mine but if I had all the things I needed in one place and 5-7 days of nothing to do I probably could have finished it in less than a week. Why travel pillows? Because they have enough to carry around with them. Travel pillows are small squishy and take up very little room, they also may good travel pillows no matter how they are traveling.
Tip: if sewing by hand to end a line of thread so it will not come undone. Go through your last 2 needle wholes 4-5 times then tie a double knot in the middle of the built up thread. This should keep it from coming undone.
1. Buy a pre-made travel size pillow (I got mine at wal-mart) They often sell pillow cases with these, you don't need one, but get one that can be washed in a washing machine. Or you can decide how big you want the pillow and buy Cotton stuffing instead of a pillow. Choose one or two fabrics to make either side of your pillow. 1/2 a yard for each side (1 yard if only one fabric) should be more than enough to cover these small travel pillows.
2. Measure your pillow's sides and cut your fabric 2 inches bigger than your pillow. Turn the "colorful" or outsides in towards each other so that both sides show the "dull" side out.
3. Sew by hand or machine 1/2 an inch in from edge on 3 sides of your fabric together. This will leave you with a pouch. 3 sides Swen together and one open.
Optional: Find a picture you like print it out on your fabric paper. Follow the pre-wash instructions on the paper's box. (That way when you sew it on it is safe to wash and won't bleed into your fabric.) Turn your pouch inside out so that the bright colors show, this is the outside of your pillow. Cut out your picture and hand or machine sew your picture(s) on to your fabric. Make sure you sew all edges down, any loose or long edges could curl or tear over time. Be sure also not to sew it through both fabrics other wise your pillow/stuffing won't fit in.
If pillow 4. If you have a pillow place it inside your pouch now then turn in 1/2 an inch of fabric (so you get a nice clean edge) and sew the end shut 1/2 an inch in from edge.
If stuffing 4. (If you did optional step turn pillow back outside in.) Sew open end closed leaving a 2-3 inch hole to put the stuffing in. Turn pillow inside out so the brighter colors "the outside" of your pillow is showing. Fill the pillow with stuffing, As much or as little as you like. When done stuffing turn the open hole in to match the rest of the edge. Sew hole closed. I find it easiest to sew this hole by hand.
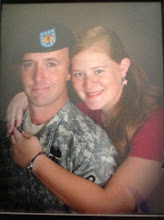
You can drench it with perfume or wash it in your detergent or sleep with it for a week or two before you send it to make it smell like you... or you can do all of the above. I slept with mine I also took a few pictures (as you can see above) of me with it so that he could see that I had made it and slept with it before sending it. This is a great little gift to send missionaries or soldiers who are away. These are also safe to put in the washing machine as long as you followed the instructions on your picture paper and sewed everything down tight enough that the threads don't come loose.
No comments:
Post a Comment